
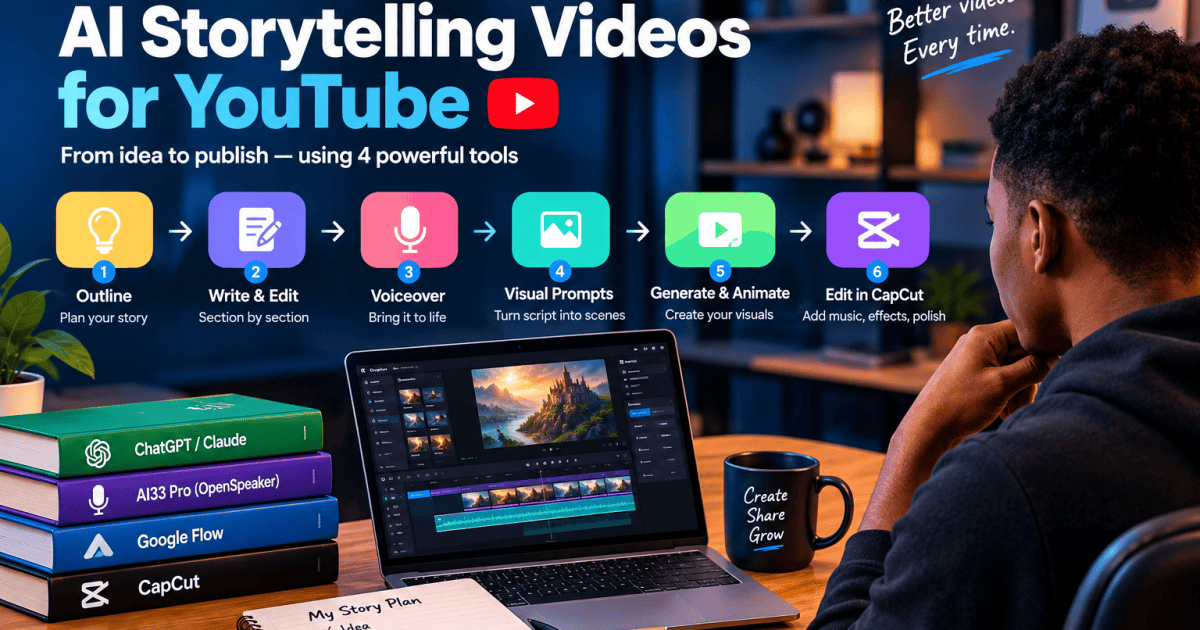
Someone asked me for my exact blueprint for making storytelling videos for YouTube. There is no magic to it.
It is one repeatable process, six steps, done the same way every time.
Here is the actual workflow, start to finish.
Key Takeaway
Building an AI storytelling video comes down to six steps: outline the story, write it section by section, edit the script, generate the voiceover, turn the finished script into visual prompts, then assemble everything in CapCut. The voiceover length sets your final runtime, and roughly 10,000 words of script gives you about an hour of narration. Write the whole story in one shot and quality drops fast. Write it in planned sections and it holds together.
The Tools in This Workflow
Four tools cover the whole pipeline. CapCut handles final editing. ChatGPT or Claude handles scriptwriting, story development, and later, image prompts. AI33 Pro handles voiceovers. Google Flow handles images and animation.
None of these are exotic. What matters is the order you use them in and the discipline of not skipping steps to save time, because the steps you skip are exactly the ones that show up as sloppy pacing or a flat, robotic voiceover later.
Step 1: Outline Before You Write a Single Word of Script
The final video’s length is set almost entirely by the voiceover, and the voiceover’s length is set by how long your script is.
So the first real decision is not the story itself, it is the word count you are building toward.
Use this as a rough starting reference, since actual pacing varies by voice and by how much natural pause sits in the script:
| Script Length | Approximate Runtime |
|---|---|
| 2,500 words | 10 minutes |
| 5,000 words | 20 minutes |
| 10,000 words | 60 minutes |
| 15,000 words | 90 minutes |
Decide your target runtime first, then work backward to a word count. Do not ask ChatGPT or Claude to write the entire story in one prompt.
Long-form AI writing degrades when you ask for too much at once, plot threads get dropped, pacing goes uneven, and the ending often feels rushed compared to the opening. Instead, ask for a detailed outline first, built around your idea and your target word count.
Once you have the outline, break it into numbered sections, Outline 1, Outline 2, Outline 3, and so on, until the full story is mapped.
Step 2: Write and Edit Section by Section
Work through the outline one section at a time, asking the AI to write each one fully before moving to the next.
This keeps the model focused on a manageable chunk of story instead of trying to hold an entire hour-long narrative in its head at once, and it gives you a natural checkpoint to catch problems early rather than after the whole draft is done.
Once every section is written, go back through the full script yourself. Cut repetition.
Fix anything that reads awkwardly out loud. AI writing tends to repeat certain phrases and sentence structures across a long piece, and those repetitions are far more noticeable once a voice actor, human or AI, is reading them aloud than they are on the page.
Step 3: Generate the Voiceover
Once the script is locked, generate the voiceover before doing anything else.
Do this before touching visuals, since the finished audio is what you will time everything else against.
AI33 Pro, also known as OpenSpeaker, covers this well.
It handles text-to-speech, voice cloning, auto-dubbing, and sound effects in one place, and it is one option used by other creators running a similar workflow.
One honest caveat worth knowing before you commit a big project to it: some users have reported the platform can feel unstable at times.
Generate your voiceover early enough in your process that you have room to retry or switch tools if something does not come out clean.
Step 4: Turn the Finished Script Into Visual Prompts
With the script finished and the voiceover generated, go back to ChatGPT with the complete text and ask it to generate visual scene prompts based on each paragraph, sentence, or key moment in the story.
Doing this after the script is locked, not before, matters. Prompting from a finished script keeps every image tied to something that actually happens in the story, instead of guessing at scenes that might get cut or rewritten later.
You can steer these prompts toward whatever visual style you want, painterly, cinematic, flat illustration, photoreal.
Be specific about that style up front, since it saves you from regenerating a batch of images later because the look does not match across scenes.
Keeping a Character Recognizable Across the Whole Story
This is one of the most common problems in AI storytelling videos.
A character looks right in scene one and subtly wrong by scene twelve, different face shape, different outfit, different build.
Viewers notice this even when they cannot articulate why a video feels off.
The fix is to lock a character reference early and reuse it deliberately rather than re-describing the character in every prompt and hoping the model stays consistent.
This is the same underlying problem Grok Imagine’s reference system and Dreamina’s Seedance model are built to solve for video generation specifically, worth knowing about if character drift becomes a recurring problem in your projects.
Step 5: Generate and Animate the Visuals
Take the scene prompts into Google Flow to generate the actual images, then decide which ones deserve animation and which work fine as stills.
This is a judgment call that varies by story. Some projects lean almost entirely on animation for a more cinematic feel.
Others use mostly stills with a handful of animated moments for emphasis at key beats. There is no fixed ratio, it depends on the story’s pacing and your budget of time and credits.
If you are animating scenes with a defined beginning and end, for example a character walking into a room and sitting down, Google Flow’s start and end frame controls are worth using directly for that, since they are built specifically for locking down a clean transition between two points rather than letting the model guess at the motion in between.
How Often to Change the Image
As a starting point, plan for a new image or scene change roughly every 8 to 15 seconds of narration for a standard pace, faster during tense or high-energy moments, slower during calm or reflective ones.
A single static image held for 45 seconds straight tends to lose viewer attention regardless of how good the image itself is. Let the emotional pace of the script guide this rather than sticking to a rigid timer.
Step 6: Assemble Everything in CapCut
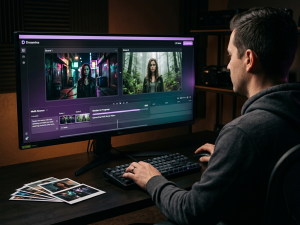
The final step brings every piece together, voiceover, images, animations, sound effects, and any music, into CapCut for editing.
This is where pacing gets locked in, timing images and animations against the voiceover, adding sound effects at the right beats, and doing a final pass for anything that feels off once everything is playing together rather than sitting in separate files.
Sound design matters more here than most people expect. A subtle ambient layer under the voiceover, a soft transition sound between scenes, a small musical swell at an emotional beat, these do more for how “produced” a video feels than another round of visual polish would.
If a video feels flat after editing, check the audio layers before assuming the visuals are the problem.
Nothing about this final step is complicated. It is mostly patience, watching the full assembled video through at least once before publishing, and trusting your ear over your eye if a moment feels wrong. If something feels off when you watch it back, it usually is.
A Worthwhile Caution Before You Build a Channel Around This
This workflow works. But the AI storytelling niche on YouTube specifically has gotten harder to build in, and this is worth knowing before you invest heavily in it.
YouTube renamed its long-standing “repetitious content” monetization policy to “inauthentic content” in July 2025, and clarified that the policy covers content that is repetitive or mass-produced.
In January 2026, that policy had its first major enforcement wave: YouTube terminated 16 channels with a combined 35 million subscribers, 4.7 billion lifetime views, and roughly $10 million in annual ad revenue. Separately, a widely cited Kapwing study of 15,000 trending channels found 278 producing nothing but low-effort, mass-generated content.
The distinction that actually matters is not whether a channel is faceless or uses AI.
It is whether there is genuine human editorial effort behind it. Channels with original scripts, real curation, and a consistent creative voice remain fully eligible for monetization under this policy.
What gets flagged is mass, templated output, identical structure, reused visuals, zero differentiation between uploads, exactly the pattern the outline-then-section approach in Step 1 and Step 2 is built to avoid.
Sometimes the smartest move as a creator is knowing when to double down on a format and when to shift your energy elsewhere.
If you build a channel with this workflow, keep an eye on how enforcement continues to play out rather than assuming today’s rules are permanent.
Where to Start
Pick one short story idea first, something you could tell in 1,500 to 2,000 words, before attempting a full hour-long piece. Run it through all six steps once, start to finish, and pay attention to where the process actually slows you down.
That first small project teaches you more about your own workflow than reading about someone else’s ever will.


















Join the discussion Tap to open the comment form +